
Recording in less-than ideal environments can have a detrimental effect on the quality of your final recording. Using the experience we’ve gathered through producing many on-location recordings, we’ve assembled our top five tips for how to get the best out of your recording, wherever you are. We will run more articles on this in future to go into a bit more detail. Read on for more about how to make your podcast sound better, wherever you are recording.
Find a better space to record in
It is worth first and foremost making sure that you are recording in the best place you can. You want to avoid reverberant rooms as much as possible and particularly rooms with pronounced ‘early reflections’. These are very short echoes that are extremely difficult to remove with software and have the potential to ruin a recording. You should be able to hear just by talking in a room whether it will be suitable for recording in – listening back on the recording you will be able to hear a ’tiled bathroom’ type sound if the early reflections are a problem.
Another (sometimes tricky to address) issue depending on where you are recording can be background noise – of course the quieter the better. Particularly of note here is air-conditioning which can completely ruin a recording, especially if someone is sitting in front of the outlet blowing air towards the microphone! This is of course a balance between keeping everyone comfortable and audio quality but turning off fans/air-conditioning while recording is pretty essential.
Generally bad rooms will be small to mid-sized, have proportions that are square or rectangluar and be quite bare of furnishings. If you can find somewhere that is better in any of these aspects then you wil be making an improvement!
Good: High ceilings, lots of soft furnishings, uneven dimensions
Bad: Low ceilings, bare walls and floors, large tables, square room dimensions
Make the space you’re in the best it can be
If you’re stuck with where you are then there are a few things you can do to try and improve your recording.
Acoustic ‘treatment’
First is dealing with the room. If you are able to, try and improve the acoustics in the room as much as possible. Recording in front of bookcases or near other furnishings can really help as can closing curtains as it will reduce the number of reflective surfaces. An area of the room with carpet/ rugs will probably be preferable to one with wood/stone/tile floors. Even hanging up coats on coat racks/hangers can help to improve the space – anything that will reduce unwanted reflections.
Recording on a large table/desk can also give some unwanted short reflections so if possible putting some items of clothing or cushions etc. on the table or desk can help to reduce reflections.
If you are recording guests remotely from their homes, the bedroom is often the best sounding room people have in their house as it usually has carpet, curtains and a bed which are great for dealing with any early reflections!
Make the most of your space
Another important factor here is positioning of the participants. You may find that certain areas of the room sound better than others – in larger rooms, being somewhere in the middle away from reflective surfaces may sound better, for example.
If you are able to get the contributors far enough apart to minimise spill betweeen microphones then you will find that your recordings are much easier to work with in post-production and you will have a better chance of being able to clean up the audio. This point also leads us on to…
Use one microphone per contributor
Having one microphone/ track per person speaking can be difficult depending on your setup but can make a huge difference to your finished recording. As well as giving you finer control over your editing and mixing, it will also make removing any excess noise much easier; in some cases you may need to use a gate or manually edit so that only one person’s microphone is active at a time which will be significantly easier with individual recordings.
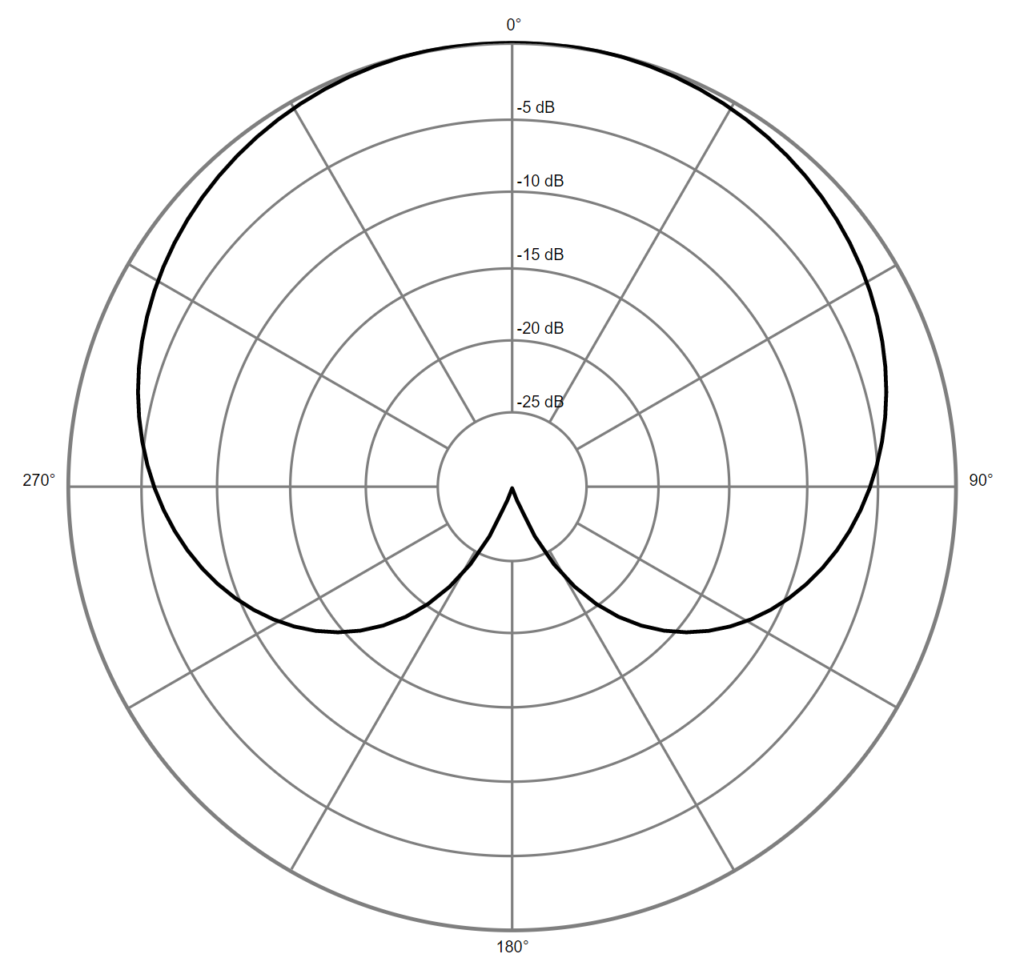
Use dynamic mics with cardioid pickup patterns
This is perhaps not quite as relevant as some of the factors listed below but can have a massive impact. The type of microphone you use in any given situation can make a big difference due to the pickup patterns and sensitivity of the microphone. The reason microphones like the Shure SM7-B and Electrovoice RE-20 are so commonly used by podcasters, for example, is because they are dynamic microphones with cardioid pickup patterns.
The way dynamic microphones work means that they really need to be close to the sound source to be effective (they work by the sound waves physically moving a diaphragm inside a coil to make an electrical current). Being closer to the sound source means a better signal to noise ratio – you’re picking up more what you want to record by being closer to it!
Most dynamic mics have a cardioid pickup pattern. A pickup pattern describes how a microphone picks up sound at different frequencies and is different for different types of microphones. A cardioid pickup pattern is useful in a situation where the room doesn’t sound very good because it is much more sensitive to sound coming in to the front of the microphone and almost totally rejects sound from the rear of the microphone. So making sure the participants are positioned in a way that means they are rejecting as much sound as possible from the other people speaking will mean better results – easy with two people, tricky with four or more!
Get microphones close to the participants
Ask anyone who sings on stage regularly and they will tell you that microphone technique is really important. The same applies to dialogue recording. Getting each microphone close to the person you are intending to record will mean a better final result (particularly if using dynamic mics as detailed above – this is quite essential!). This of course depends on how loudly someone is talking/ their emotional range etc. – we will address gain staging in another article.
Sometimes you might be working with people that are less experienced in recording dialogue and may not understand the importance of staying close to the microphone – it can be quite hard if you’re not used to talking with something in front of you all the time! Just a short reminder to participants before recording to try and stay close to the microphone can be very helpful.
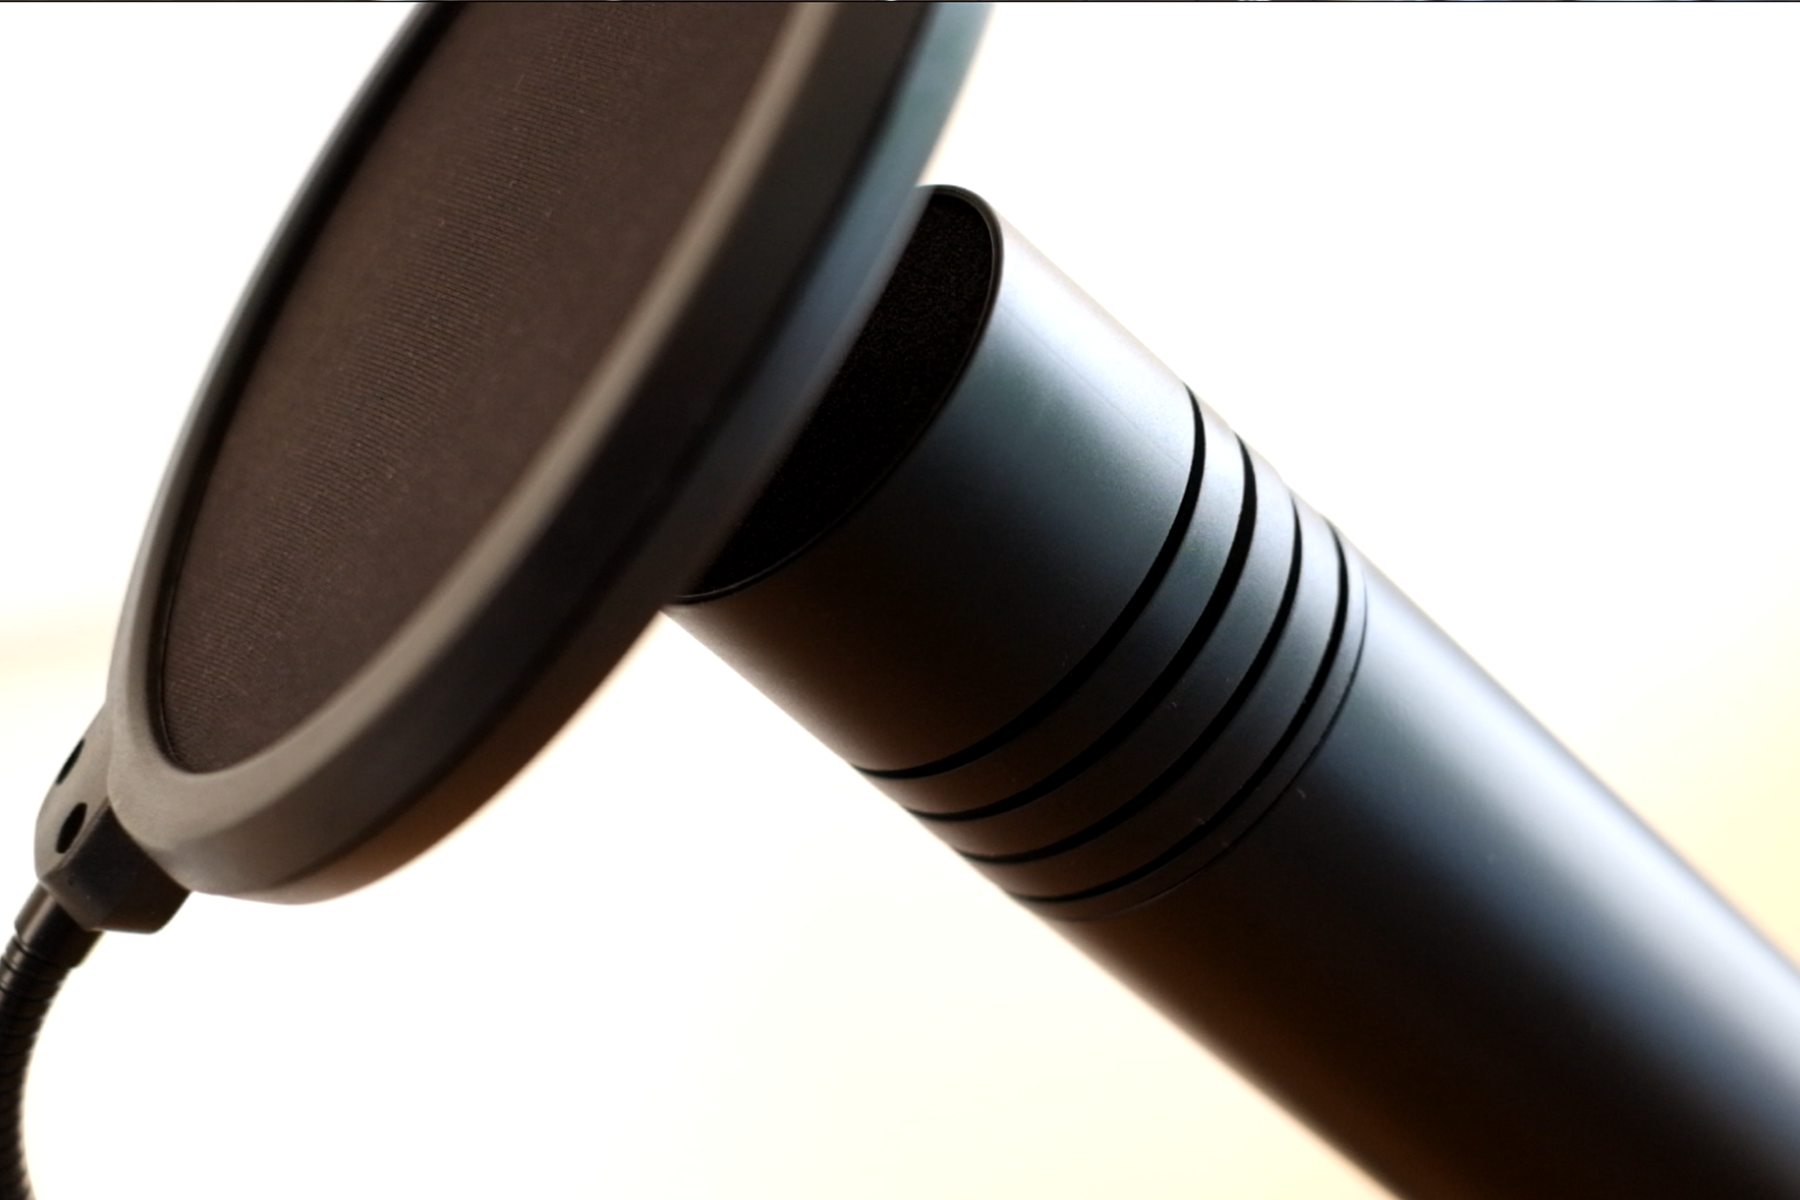
Using pop shields can sometimes help here as it means you can speak close to the microphone without the fear of picking up hard plosives and also gives a more obvious ‘barrier’ for the participant. The downside is that pop shields can be quite large which can make it harder for people to see each other so bear this trade-off in mind. Our experience has shown that even with microphones that have built-in shields such as the Shure SM7-B, a pop shield can help yield a more consistent-sounding result.
How we can help
Hopefully these tips will help you get the best out of a bad situation. If you want more advice or would like help recording your podcast or other spoken word content, don’t hesitate to get in touch with us to discuss your project.